Youth Code Jam Receives $5,000 STEM Action Grant from Society for Science

The STEM Action Grant will help Youth Code Jam Incorporate ASL Captioning and Inclusive Accommodations to Coding Camps and Activities

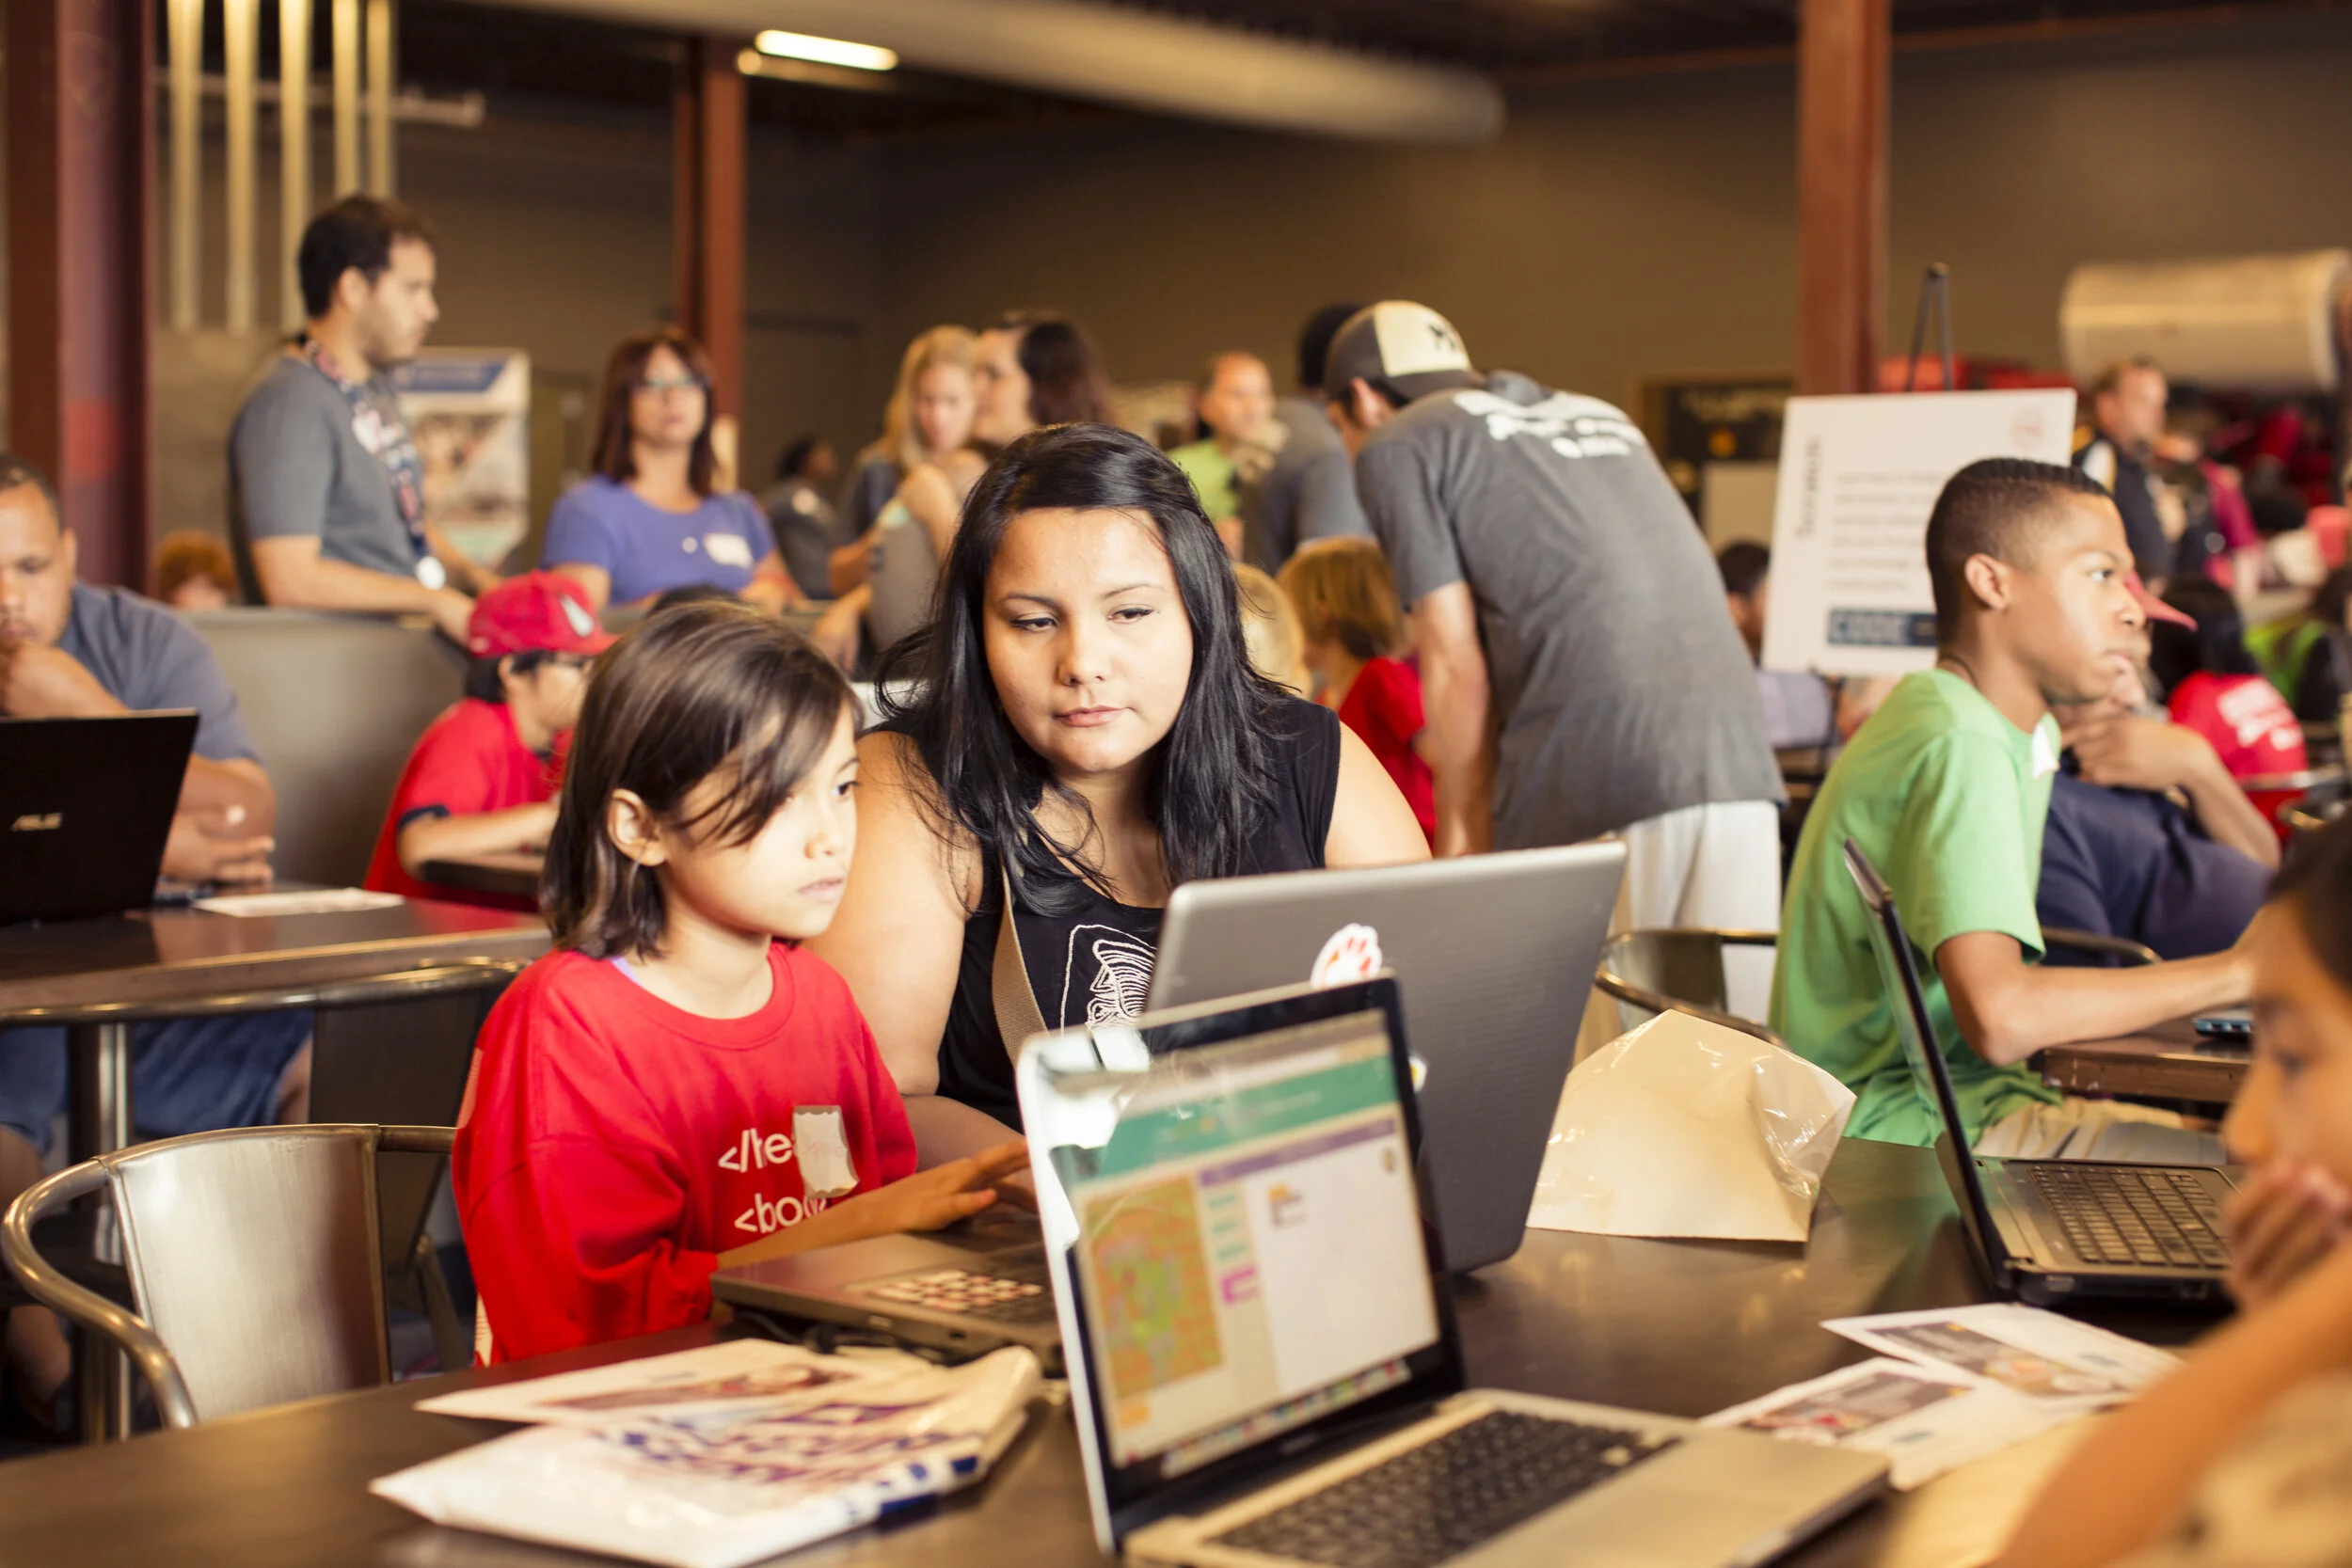
Youth Code Jam, a San Antonio organization that offers free and inclusive coding camps and computer science activities, received a $5,000 amount grant from the Society for Science, a national nonprofit organization dedicated to expanding scientific literacy, effective STEM education and scientific research. The STEM Action Grant program bolsters and improves outcomes for groups that have been historically left behind in STEM education and careers, including Black and Latinx individuals, women and gender-expansive persons, the hearing and visually impaired as well as low-income students.

With this grant, Youth Code Jam will incorporate ASL captioning and additional accommodations to serve more blind, deaf, and hard-of-hearing students with their coding camps and programs.

“We received great feedback on adding an ASL interpreter to a recent summer coding camp. Our team is grateful for the opportunity to continue expanding our programs and showing students that computer science can be fun, creative challenge for everyone,” said Lori Price, Executive Director of Youth Code Jam.

Youth Code Jam is a nonprofit organization that makes computer science and coding fun, accessible, and equitable for all students. Youth Code Jam was one of 38 groups that received $165,000 in microgrant funding through the Society’s STEM Action Grant program. A complete list of this year’s grantees can be viewed here. Since 2016, (including this announcement), the program has given $410,000 total to 64 organizations.

Society for Science and Youth Code Jam Logo

Community Partner H-E-B Builds an Inclusive Workforce with Diversity Bridges Program

Community Partner H-E-B Builds an Inclusive Workforce with Diversity Bridges Program

Launched two years ago, the Diversity Bridges Program “focuses on providing jobs and support to people with disabilities” and reducing barriers to employment for everyone. Part of this program is dedicated to providing opportunities in the tech industry to people on the autism spectrum.

Digital Literacy: What It Is & Why It Matters

Digital Literacy: What It Is & Why It Matters

We focus on more than just coding at Youth Code Jam. While coding is a great skill for students to learn and helps them to approach problems in new ways, there’s a different set of skills they’ll need to be successful in a digital world, whether or not they go on to be programmers. These skills fall under the category of digital literacy.

What is Scratch?

What is Scratch?

We at Youth Code Jam use Scratch in a lot of our coding activities. In fact we use it so much for our lessons, that we have a YouTube playlist dedicated to Scratch coding activities. Families new to Youth Code Jam, as well as those who have been with us for a while, probably wonder why we use this tool so much in our programming. Read on to find out why and what exactly Scratch is.

How to Use Scratch

In another post, we discussed what Scratch is and why we use it in Youth Code Jam programming. In this post, we will cover how to create an account and the Scratch Editor.


Create a Scratch Account

Step 1: Getting Started

Screen Shot 2021-03-11 at 10.07.45 AM.png

Go to https://scratch.mit.edu and click the “Join Scratch” link at the top of the page.

Step 2: Create your username and password

Screen Shot 2021-03-11 at 10.14.19 AM.png

Have your student create a username that they will remember. But make sure it does not include their first, middle, or last name. While Scratch is mainly targeted toward students in grades K-12, there are adults on the site. Help protect your student’s privacy by creating a fun username with them. Also, take this opportunity to teach your student how to create a strong password. (Here are some tips on passwords from Google.)

Save the username and password somewhere safe so you and your student can find it if either are forgotten.

Step 3: Answer the Prompts

Screen Shot 2021-03-11 at 10.19.10 AM.png

After creating your username and password, answer the series of questions. You can use your birthdate or your student’s. This information is not visible on the site.

For the email address, use either your personal email or your student’s email. Email accounts from schools or workplaces may block Scratch messages, so it’s best to use a personal email.

Click the button to create your account. Then click “Get Started.”

Step 4: Verify your Email

Screen Shot 2021-03-11 at 10.26.08 AM.png

You’ll notice an orange block at the top of the page that asks you to confirm your email address. Sign into the email account you used to create your Scratch account. Find the verification email from Scratch. The sender will be no-reply@scratch.mit.edu, and the subject line will be “Confirm your Scratch account.” Click the confirmation button or link provided. Now you’re ready to share your work (always optional), remix programs, and participate in the Scratch community!

Screen Shot 2021-03-11 at 10.22.44 AM.png
Screen Shot 2021-03-11 at 10.23.51 AM.png

If you forget to do this or can’t find the email, click on your username in the upper right corner of the screen and select “Account Settings.” In the menu on the left, click “Email.” If your email is unconfirmed, you can resend a confirmation email by entering your Scratch password and clicking resend. Then follow the instructions above to confirm your email.

Step 5: Start coding!

Screen Shot 2021-03-11 at 10.28.08 AM.png

Explore existing Scratch projects or head to the editor to get started!


The Scratch Editor

Screen Shot 2021-03-11 at 11.04.40 AM.png

To open the Scratch Editor, click on “Create” at the top of the Scratch page. The editor is simple to use, but there are a lot of parts. We’ll break the editor into different sections and go through each one.

Section 1: Top Menu

Screen%2BShot%2B2021-03-11%2Bat%2B11.06.16%2BAM.jpg

The top menu are the links that appear on the deeper blue at the top page. We’ll work from left to right on the options:

Screen Shot 2021-03-11 at 11.20.07 AM.png
  • Scratch Icon: Clicking this button will take you to the Scratch homepage.
  • World Icon: This is a drop down menu that will let you change the language of the Scratch editor.
  • File: Gives you the option to create a new project, save the current project, save a copy of the current project, load a Scratch file from your computer (i.e.: You exported a project from Scratch Desktop and want to upload it online), save a Scratch file to your computer.
  • Edit: Gives you the options to restore your saved project to a previous version or turn on Turbo Mode, which will run your project faster than normal.
  • Tutorials: If you’re a newbie or need to refresh your Scratch tutorials, check out these tutorials to learn some of the basics.
  • Project Name: If you’re signed into your account, you can name your project.
  • Share button: By clicking this button, the project becomes public. This means others can see, test, and comment on your project.
  • See Project Page: This button takes you to the shared view of your project. From this page, you can turn comments on or off, add instructions on how to use your project, add other notes or give credit to sources who helped you, add your project to a studio, or get a link or embed code to share your project. To re-enter the editor, click the See Inside button.

Section 2: Left Panel Menu

Screen Shot 2021-03-11 at 11.25.50 AM.png
Screen Shot 2021-03-11 at 11.26.01 AM.png
Screen Shot 2021-03-11 at 11.27.37 AM.png

The left panel menu contains three sections separated by tabs: Code, Costumes and Sounds.

  • Code tab: The Code tab contains the blocks users will use to code their project. The blocks are broken out into groups represented by color palettes. For example, the Motion blocks are all dark blue; the Looks blocks are purple, etc. Users can create their own blocks using the My Blocks palette, and connect their code to external devices by clicking the Add Extension button in the bottom left corner of the panel.
  • Costumes tab: The Costumes tab opens up the Sprite editor. Users can edit existing costumes for sprites (the characters), create new costumes, and create new sprites in this tab.
  • Sounds tab: In the Sounds Editor, students can edit the default sounds of a sprite, add new sounds from the Scratch option by clicking the speaker icon in the bottom left corner, or record their own sounds to add to the program.

Section 3: The Workspace

Screen Shot 2021-03-11 at 11.31.35 AM.png

The Workspace is the empty, white middle section of the editor. Users will drag and drop code blocks here to build their program.

Section 4: Staging Menus

Screen Shot 2021-03-11 at 11.31.43 AM.png

The right side of the editor has three parts: the Stage, the Sprite Panel, and the Stage Panel.

  • The Stage: This will show your background and sprites, and will be where you see your code run.
  • The Sprite Panel: This is where you can manage your sprites. By clicking the cat icon in the bottom right corner of the panel, you can add sprites from the Scratch library, upload images from your device, or open the Costumes Editor to create your own sprite. At the top of the panel, you can change the sprite name, its horizontal and vertical position, its size, whether it’s automatically visible when the program starts or not, and the direction the sprite is facing.
  • The Backdrop Panel: By clicking the photo icon at the bottom of this panel, users can add backgrounds from the library, create their own in the editor, or upload one from their computer.

And that brings us to the end of the parts of the Scratch Editor. Take some time to explore all it has to offer with your student, and have fun learning to code!

Black History Month Pioneer Spotlight: Frederick Hutson

Black History Month Pioneer Spotlight: Frederick Hutson

Hutson is the CEO and founder of Pigeonly, a tech company dedicated to creating products for the overlooked and underserved. In particular, the company develops software to “address and solve communication barriers between inmates and their support network of family and friends.”

Black History Month Pioneer Spotlight: Damola Ogundipe

Black History Month Pioneer Spotlight: Damola Ogundipe

Ogundipe is the CEO and co-founder of Civic Eagle. Civic Eagle is a start-up software company focused on using “technology to promote better democratic outcomes for people and their communities. The staff at Civic Eagle know that the legislative process is confusing, and want to help fix that.